Creating images for Microsoft Azure with Packer
Packer is an open source tool that can be used to define and build custom images in Microsoft Azure. Packer works across multiple platforms and will seamlessly work with Azure Resource Manager (ARM) to create and store custom images in Azure. If you want to create your own custom images in Azure with Packer hopefully this introduction guide will help you make a start with that.
At a high level there are 4 steps to capturing an image.
- Generate a Service Principal in your Azure AD instance (generally you’d only do this once during initial setup)
- Create a json build file that will take an available Azure Marketplace OS image, customise it and prepare it to be used as template for the image
- Install Packer on your machine (you can skip this step if you’ve already installed it)
- Create the image (which can then be deployed as and when you need)
Generating a Service Principal
Packer needs permissions to create and delete resources in your Azure subscription during the creation of an image, this is achieved by creating a Service Principal (SP) in Azure AD and assigning the SP the rights required. This is generally speaking a one time thing, you’d carry this step out once and then reuse the SP each time you wanted to create a new image.
To help I’ve created a PowerShell script which is available here, this creates the SP, assigns it permissions and outputs values that you’ll need to include in the your json build file. Take note of the sections marked below, you’ll want to update these with your own values.
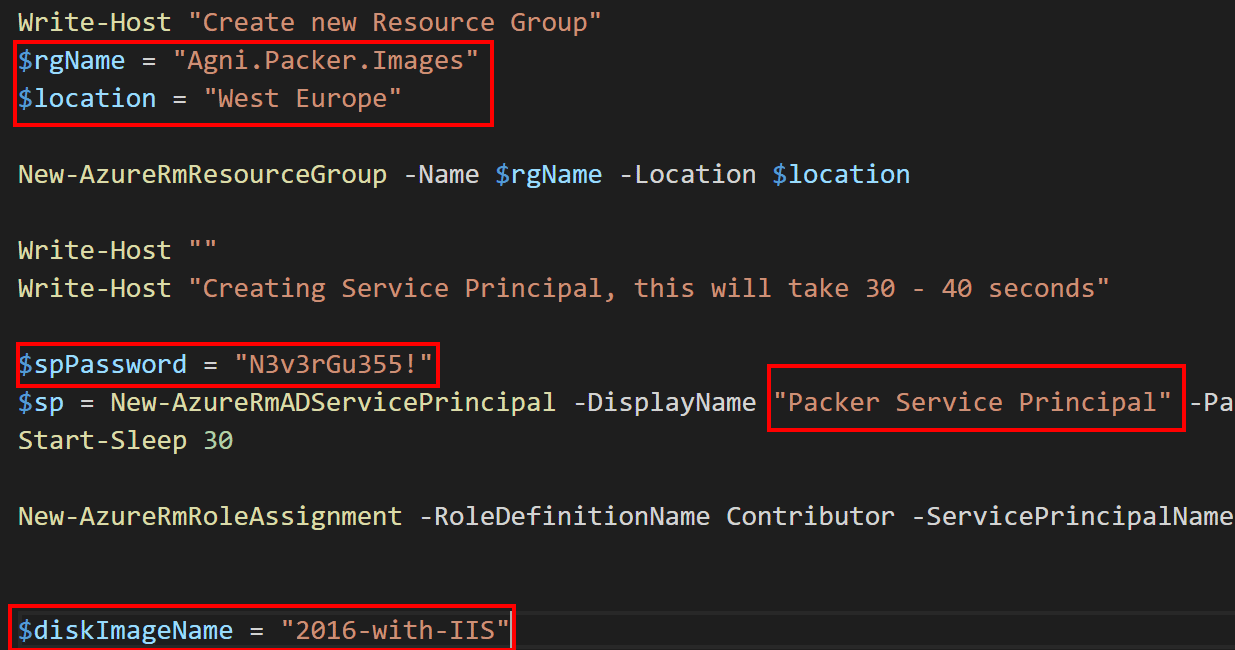
The string stored in $rgName will be the name of the resource group that will hold the image you create, so you’ll want to create something appropriate and it needs to confirm to naming requirements of a resource group, i.e. no spaces or special characters in the name.
You should also ensure you choose a suitably strong password and you should store this securely, I’d recommend storing it in KeyVault as you could also reference in your json file (a post for another day) which would stop the password being exposed. _Bottom line, the SP created has a high level of privilege in your subscription and you should take care to protect it._*
You’ll need the AzureRM PowerShell modules installed, load a PowerShell window and run the script as shown below:

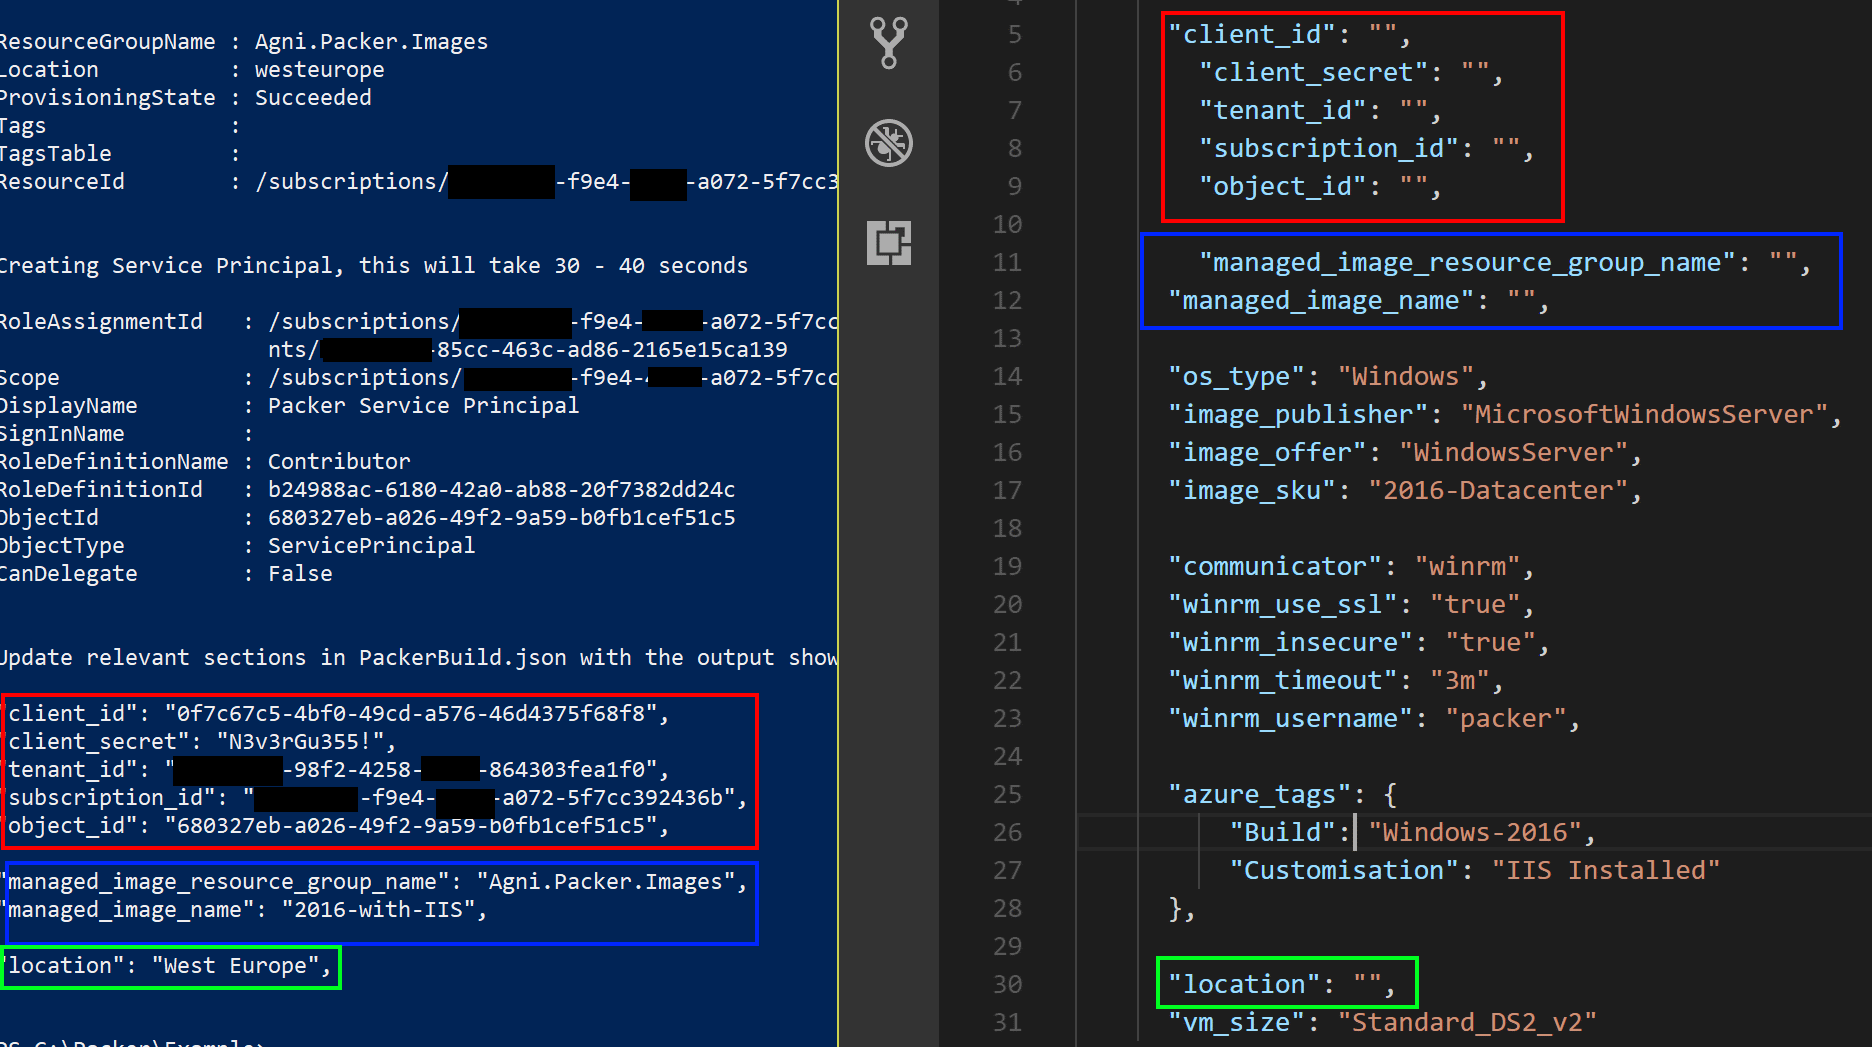
The script will create the new SP and will also output a number of values that you’ll need to input add to your json file.
Creating the json file
I’ve a sample file here that I’m using in this example and that you can use as a starter. When you run the PackerAzurePrep.ps1 file you’ll get output like that shown above, the values in the coloured boxes on the left screen shot should be copied into the json file on the right screen.
The sample file I’ve provided will install IIS on the image and then sysprep it, readying it to be used as an image going forward. The provisioners section of the script deals with customising the image, more information on that can be found on the Packer website here where you’ll see all the provisioners that are available.
Installing Packer
This bit is easy, browse to the Packer website downloads page here and chose the version for your platform, run through the install.
Create the image
You’ll now start Packer referencing the json file you’ve created

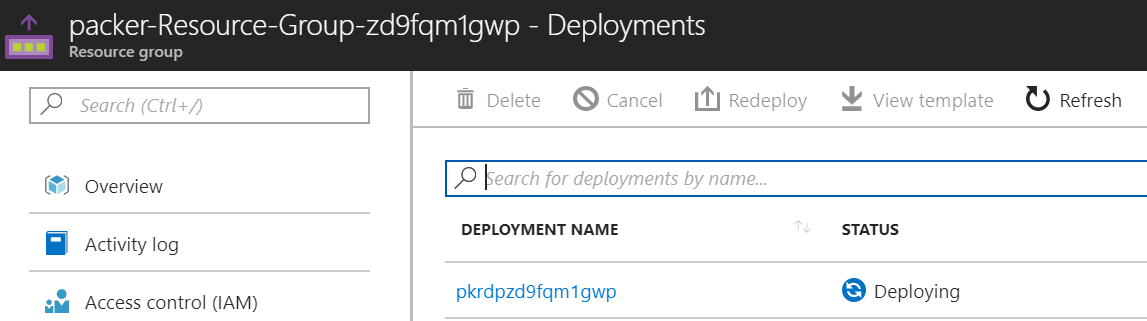
Packer will then create a temporary resource group, build and configure your image, sysprep it and then create the image in the resource group you specified. It can do all this as it will use the SP you created earlier which has the required rights in your subscription to actually do all this. Packer will tidy up after itself too, it will delete the temporary resource group it created and any resources deployed in it. You can check on the progress of the build in the Azure portal if you’re so inclined, although Packer will report progress as it works through the build.
Once the build has completed you’ll get an output similar to that shown below

If you check the resource group in the Azure Portal you’ll see the image as shown below

I hope you’ve found this interesting. One thing I will call out is that I followed the Microsoft guide here for how to use Packer with Azure, and I experienced a number of issues with sysprep failing and my images failing to generalise, the microsoft guide uses
if( Test-Path $Env:SystemRoot\\windows\\system32\\Sysprep\\unattend.xml ){ rm $Env:SystemRoot\\windows\\system32\\Sysprep\\unattend.xml -Force} & $Env:SystemRoot\\System32\\Sysprep\\Sysprep.exe /oobe /generalize /quiet /quit
to initiate a sysprep, a bit of googling lead me to discover that using
if( Test-Path $Env:SystemRoot\\windows\\system32\\Sysprep\\unattend.xml ){ rm $Env:SystemRoot\\windows\\system32\\Sysprep\\unattend.xml -Force},
& $env:SystemRoot\\System32\\Sysprep\\Sysprep.exe /oobe /generalize /quiet /quit,
while($true) { $imageState = Get-ItemProperty HKLM:\\SOFTWARE\\Microsoft\\Windows\\CurrentVersion\\Setup\\State | Select ImageState; Write-Output $imageState.ImageState; if($imageState.ImageState -ne &"IMAGE_STATE_GENERALIZE_RESEAL_TO_OOBE") { Write-Output $imageState.ImageState; Start-Sleep -s 10 } else { break } }
gives you better results, all my builds using this updated sysprep approach worked 100%.
Have fun making images!!
Needless to say any SPs created during the walk-through above have long been deleted!!